
How to Store and Ship DTF Transfers Properly
So, you've got these awesome DTF transfers, right? And you want them to look great when you finally use them, or when you send them off to a customer. It's not just about making them; it's about keeping them perfect. If you don't store them the right way, or if you mess up the shipping, all that hard work can just go to waste. Nobody wants faded colors or sticky, ruined transfers. This article is all about making sure your DTF transfers stay in top shape, from your storage shelf to their final destination.
Key Takeaways
- Always keep your DTF transfers in a cool, dry place to stop them from getting messed up.
- Using resealable bags with some silica gel packets really helps keep moisture away from your transfers.
- Laying your transfers flat and putting parchment paper between them stops them from sticking together or getting creases.
- When you're sending out dtf gang sheets or other transfers, pick strong packaging that will protect them from bending or getting wet.
- Watch out for signs like transfers not sticking or looking faded; that usually means they weren't stored right and might be too old to use.
Optimal Storage Conditions for DTF Transfers
It's easy to overlook, but how you store your DTF transfers can seriously impact their quality and usability over time. Think of it like storing food – you wouldn't leave milk out on the counter, right? Same principle applies here. Let's get into the specifics to keep your transfers in tip-top shape.
Maintaining Consistent Temperature
Temperature fluctuations are a big no-no. Ideally, you want to keep your DTF transfers in a cool, stable environment. Extreme heat can mess with the adhesive, and extreme cold can make the film brittle. Aim for a temperature range between 65-70°F (18-21°C). This is generally considered room temperature, so it shouldn't be too hard to achieve. If you're in a place with crazy weather, consider a climate-controlled space.
Controlling Humidity Levels
Humidity is another major factor. Too much moisture in the air can cause the transfer film to warp or the ink to run. Aim for a humidity level below 50%. Here's a simple breakdown:
| Humidity Level | Potential Issues |
|---|---|
| Above 60% | Warping, ink bleeding, adhesive degradation |
| 40-50% | Ideal range |
| Below 40% | Potential for static cling, slight film brittleness |
Using a dehumidifier in your storage area can be a game-changer, especially if you live in a humid climate. Also, keep an eye on the humidity levels – a simple hygrometer can do the trick. Regularly check your humidity levels to ensure they are optimal.
Protecting from Direct Sunlight
Sunlight is the enemy! UV rays can fade the colors on your DTF transfers and degrade the adhesive over time. Always store your transfers in a dark place, away from direct sunlight. A closed cabinet or a room with blackout curtains works wonders.
Think of your DTF transfers like vampires – they hate the sun! Seriously though, prolonged exposure to sunlight can significantly shorten their lifespan. Keep them in the dark, and they'll last much longer. This is especially important for DTF gang sheets with multiple designs.
Here are some quick tips to remember:
- Keep the temperature consistent.
- Control the humidity.
- Shield from sunlight.
Essential Storage Supplies for DTF Transfers
Okay, so you've got your DTF transfers, now what? Just tossing them in a drawer isn't going to cut it if you want them to last. You need the right supplies to keep them in tip-top shape. Think of it like this: you wouldn't leave a cake out in the rain, would you? Same principle applies here. Let's talk about what you need.
Utilizing Resealable Bags and Silica Gels
Resealable bags are your first line of defense against moisture and dust. I've found that the ones specifically designed for archival purposes work best, they're a bit thicker and more durable. But here's the kicker: you can't just throw the transfers in there and call it a day. You need silica gel packets. These little guys are moisture magnets. Pop a few of those in the bag with your transfers, and you're golden. I usually use about two small packets per bag, depending on the size. You can find different-sized cylindrical bags online.
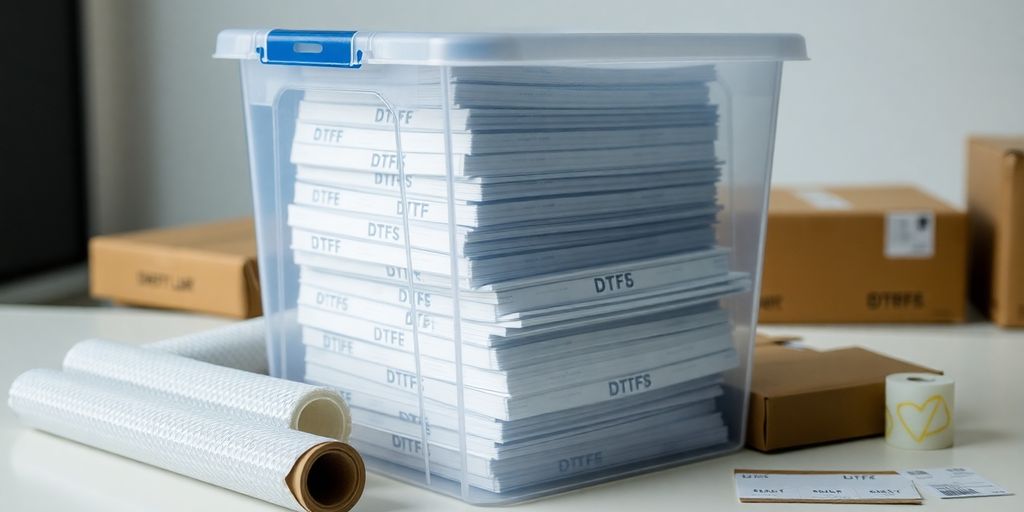
Storing in Airtight Plastic Bins
For larger quantities, or if you just want an extra layer of protection, airtight plastic bins are the way to go. I like the ones with the snap-on lids, they create a really tight seal. Make sure the transfers are lying flat inside the bin; you don't want them all crumpled up. And again, don't forget the silica gel! You can even get larger desiccant packs for bins. I've had good luck with the clear bins, makes it easy to see what's inside without having to open them up every time. For commercial needs, flat file cabinets are ideal.
Employing Parchment Paper Between Sheets
This one's super simple, but it makes a big difference. Just like you use parchment paper when baking to keep cookies from sticking, you can use it to keep your DTF transfers from sticking to each other. Cut the parchment paper slightly larger than your transfers, and place a sheet between each one. This is especially important if you're storing multiple transfers in the same bag or bin. Trust me, you'll thank me later when you're not trying to peel apart a stuck-together stack of transfers. It's also a good idea to use DTF transfer sheets to maximize storage space.
Best Practices for Organizing DTF Transfers
Keeping Transfers Flat to Prevent Creasing
Okay, so you've got your DTF transfer sheets. Now what? First things first: keep them flat! Creasing is the enemy. Seriously, a crease can ruin the whole design when you go to transfer it. Think about it – that imperfection will press right onto your garment. Nobody wants that. Stack them carefully, or better yet, use a folder or portfolio to keep them nice and smooth. I've even seen people use large, flat art portfolios. Whatever works, just keep 'em flat!
Avoiding Excessive Stacking
While keeping your transfers flat is important, so is avoiding stacking them too high. Think of it like pancakes – too many, and the ones on the bottom get squished. The same thing can happen with your DTF transfers. The weight from the stack can cause the bottom transfers to distort or even stick together, especially if there's any humidity. I try to keep my stacks to a reasonable height – maybe 20-30 sheets max, depending on the thickness of the transfer. If you have a ton of transfers, it's better to spread them out into multiple smaller stacks. Also, consider using gang sheets to maximize space.
Using Shelves and Organizers
Shelves and organizers are your friends! Seriously, they can make a huge difference in keeping your DTF transfers neat and accessible. I use a combination of shelves and drawers to store mine. The shelves are great for larger stacks or for storing transfers that I use frequently. The drawers are perfect for smaller quantities or for keeping different designs separate. You can find some pretty affordable shelving units at most office supply stores. Look for shelves designed for letter-size papers or larger items. Also, don't forget to label everything! Trust me, future you will thank you when you're not digging through piles of transfers trying to find that one specific design.
Proper organization isn't just about aesthetics; it's about protecting your investment. By keeping your DTF transfers organized, you're minimizing the risk of damage, making it easier to find what you need, and ultimately, saving yourself time and money.
Maximizing Shelf Life of DTF Transfers
Understanding Transfer Longevity
So, you've got a bunch of DTF transfers and want to make sure they don't go bad before you get a chance to use them? Totally understandable. The shelf life of DTF transfers really depends on how well you store them. Generally, you're looking at anywhere from 6 months to a year for optimal results. But, with the right conditions, some can last even longer. Think of it like produce – treat it right, and it'll last; neglect it, and it's going in the trash sooner than you think. It's a good idea to use them within 180 days if you can't maintain perfect storage conditions.
Recognizing Signs of Degradation
How do you know if your DTF transfer film is past its prime? Keep an eye out for a few key things:
- Adhesive Issues: If the transfer isn't sticking properly, that's a big red flag.
- Discoloration: Fading or changes in color vibrancy mean the transfer might be degrading.
- Warping or Creasing: If the transfer film is no longer flat, it can cause problems during application.
- Premature Peeling: If the design starts to peel away from the backing before you even press it, it's likely gone bad.
It's always a good idea to do a small test press before committing to a big project with older transfers. This can save you a lot of time and frustration in the long run. If you notice any of these signs, it's best to toss the transfer and start with a fresh one.
Proper Handling of DTF Gang Sheets
DTF gang sheets are awesome for maximizing your printing efficiency, but they also need some special care to extend their shelf life. Here's the deal:
- Keep Them Flat: Just like individual transfers, gang sheets need to be stored flat to prevent creasing and warping.
- Avoid Overcrowding: Don't stack too many gang sheets on top of each other, as this can put pressure on the bottom sheets and cause damage.
- Use Interleaving: Place parchment paper between each gang sheet to prevent the transfers from sticking together, especially in warm or humid conditions. This is especially important for [custom DTF transfers ready to press].
- Resealable Bags: Store the gang sheets in resealable bags to protect them from dust, dirt, and moisture. This helps maintain a consistent environment and extends their lifespan.
Shipping DTF Transfers Safely
Shipping DTF transfers requires a bit more thought than just tossing them in an envelope. You want them to arrive in perfect condition, ready for application. Here's how to make sure that happens.
Preparing Transfers for Transit
First things first, you need to prep those transfers! The goal is to protect the printed image from scratches, creases, and moisture.
- Place each transfer between sheets of parchment paper. This prevents the transfers from sticking to each other or to the packaging.
- For added protection, especially in humid climates, consider using a resealable bag with a small packet of silica gel to absorb any moisture.
- If you're shipping multiple transfers, group them together carefully, ensuring they are all facing the same direction to avoid any potential rubbing or scratching.
Selecting Appropriate Packaging Materials
Choosing the right packaging is key to a successful delivery. A flimsy envelope just won't cut it.
- Rigid mailers are a great option for smaller quantities of transfers. They provide a solid barrier against bending and crushing.
- For larger orders, consider using a sturdy cardboard box. Make sure the box is appropriately sized to prevent the transfers from shifting around during transit.
- Bubble wrap or foam padding can be used to fill any empty space in the box, providing extra cushioning and preventing movement. You can also support eco-friendly DTF transfers by using recycled or biodegradable packing materials.
Ensuring Protection Against Damage
Even with the best packaging, there's still a chance of damage during shipping. Here's how to minimize that risk.
- Clearly label the package as "Fragile" and "Do Not Bend." This alerts postal workers to handle the package with extra care.
- Consider adding insurance to your shipment, especially for large or valuable orders. This will protect you in case of loss or damage during transit.
- If you're shipping internationally, be sure to comply with all customs regulations and labeling requirements. This will help prevent delays and ensure a smooth delivery.
Think of it this way: you're not just shipping a product; you're shipping your reputation. Taking the extra time and effort to package your DTF transfers properly shows your customers that you care about the quality of your work and their satisfaction. It's an investment that pays off in the long run.
Troubleshooting Common DTF Transfer Issues
Addressing Adhesion Problems
Sometimes, your DTF transfer just won't stick properly, and it's super frustrating. The most common culprit is incorrect heat press settings. Make sure you're using the temperature and pressure recommended for your specific transfer and fabric. Also, pre-pressing the garment to remove moisture can make a big difference. If you're still having trouble, try increasing the pressure slightly or adding a few seconds to the pressing time. Expired transfers can also cause issues, so always check the date!
Preventing Premature Peeling
Nobody wants their design peeling off after just a few washes. To avoid this, make sure the DTF film has fully cooled before peeling. If you peel it while it's still warm, the adhesive might not have set properly. Also, using a high-quality heat press and ensuring even pressure across the entire design are key. Some fabrics also require a second press after peeling to fully cure the ink.
- Check your heat press temperature with a thermometer.
- Ensure even pressure across the design.
- Consider a second press after peeling.
Identifying Damaged Transfers
Before you even start pressing, give your transfers a good once-over. Look for any cracks, creases, or areas where the ink is flaking off. These are signs of damage that can affect the final result. Proper storage is crucial to prevent damage, so keep your transfers flat, in a cool, dry place, away from direct sunlight. If you notice any damage, it's best to discard the transfer and use a fresh one. It's better to waste a transfer than ruin a garment!
It's a good idea to keep a log of any issues you encounter with your DTF transfers. Note the date, transfer type, fabric, and any troubleshooting steps you took. This can help you identify patterns and prevent future problems.
Conclusion: Keeping Your DTF Transfers in Good Shape
So, that's the scoop on keeping your DTF transfers nice and ready to go. It's not super complicated, but a little bit of care goes a long way. Just remember to keep them dry, out of the sun, and at a normal room temperature. If you do that, your transfers should be good to use whenever you need them. And hey, if you ever notice them acting weird, like not sticking right, it might be time to get some new ones. It happens! Just grab fresh transfers and keep on creating awesome stuff.
Frequently Asked Questions
How long can I keep DTF transfers in storage?
DTF transfers can typically last for several months to a year if you store them correctly. To get the best results, try to use them within six months, as the sticky part might not work as well over time.
What's the best way to store DTF transfers?
The best way to store DTF transfers is to keep them flat and away from very hot or cold places. Use bags that can be sealed or folders, and put them in a cool, dark spot, ideally at normal room temperature. Putting parchment paper between the sheets can also stop them from sticking together.
How do I know if my DTF transfers are still good to use?
You can tell if your DTF transfers are still good by checking the sticky side. If it's not sticky anymore or the picture looks faded, it might be time to throw it away. Also, if the transfer doesn't stick well to the fabric when you press it, that could mean it wasn't stored right.
Why aren't my DTF transfers sticking?
If your DTF transfers aren't sticking, it could be because they were stored in bad conditions, like being too hot, too cold, too humid, or in direct sunlight. Making sure they are stored in a dry place at room temperature will help prevent this problem.
Can I store different kinds of DTF transfers together?
It's usually better to store different kinds of DTF transfers separately so their sticky parts don't mix or get dirty. If you have to store them together, make sure to put parchment paper between each sheet to stop them from sticking to each other.
How long do DTF transfers stay on shirts?
When you put them on correctly, DTF transfers can last through more than 50 washes without fading or cracking. They will keep their bright colors and stay strong.


